Thursday, September 29, 2022

The Ultimate Cozy Color Palettes & Complementary Finishes

Copper sink in a white kitchen.


One of the first words that springs to mind when describing your ideal living space would probably be “cozy” or “homey.” After a long work day or weekend trip, there is nothing better than coming home and cozying up in an environment that makes you instantly relaxed. 

Of course, the furnishings or materials in your living space are a huge factor in how comfortable you can get – from the soft lighting of your lamps to the blankets or pillows on your favorite chair. But did you realize that the color combinations in your home also have a major impact on the cozy factor?

Choosing a color palette that reflects cozy colors will set the tone for your entire space, so it’s important to think about the hues that are most inviting and complement the room’s finishes. 

As you look to refresh one of your rooms and make it as warm as possible, here are some of the most undeniably cozy colors and the finishes that pair best with them.


Rustic Ruby + Champagne Bronze

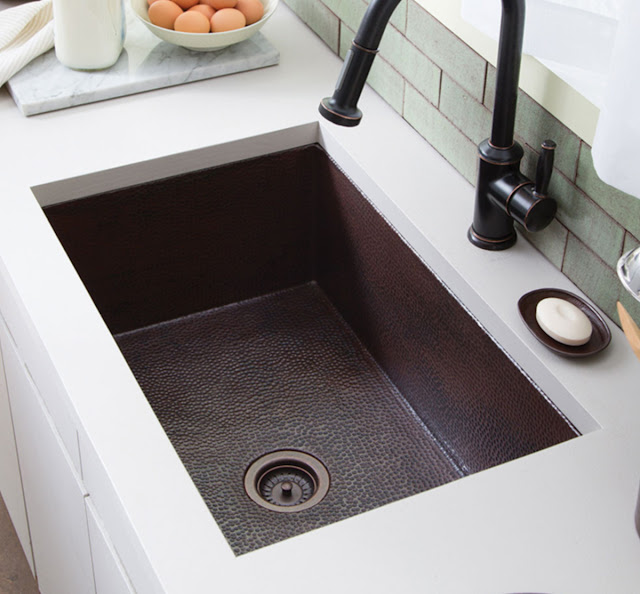
If the room you’re looking to revamp has a generally neutral color palette like khaki, ivory, or taupe, you can immediately make it feel cozier by adding in a pop of color like rustic ruby. Shades of ruby or red are definitely saturated but still have a brown undertone that will keep things cozy and complement the rest of the monochromatic colors in the room. 

You can jazz up the overall palette by focusing on the room’s finishes, such as cabinet knobs or door handles, and incorporate a finish like champagne bronze. In combination, the ruby color, bronze finishes, and neutral palette will look homey and warm.

Mood board featuring red and bronze color palette.


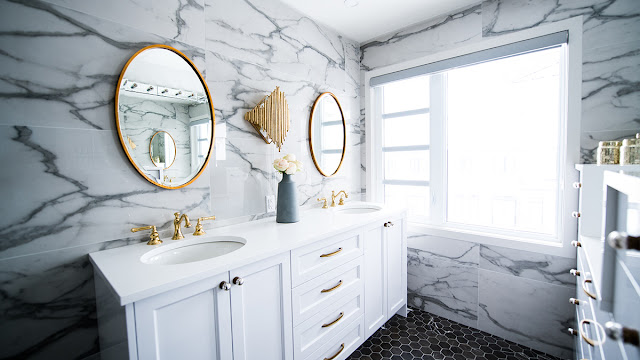
Sage Green + Italian Brass

Sage is this year’s most popular shade of green according to Google Trends. Thanks to its serene and calming effect, sage is a great choice for a cozy space and it pairs extremely well with an elegant finish like Italian brass. 

This particular color combination is perfect for a bathroom update, as it will give off the effect of a spa or even outdoor garden setting with refined, European finishes. For example, adding this premium sink faucet in Italian brass in a bathroom that’s painted sage green and is dotted with quaint house plants will make the space appear lived-in and cozy.

Mood board featuring green and brass color palette.


Deep Aqua + Polished Nickel

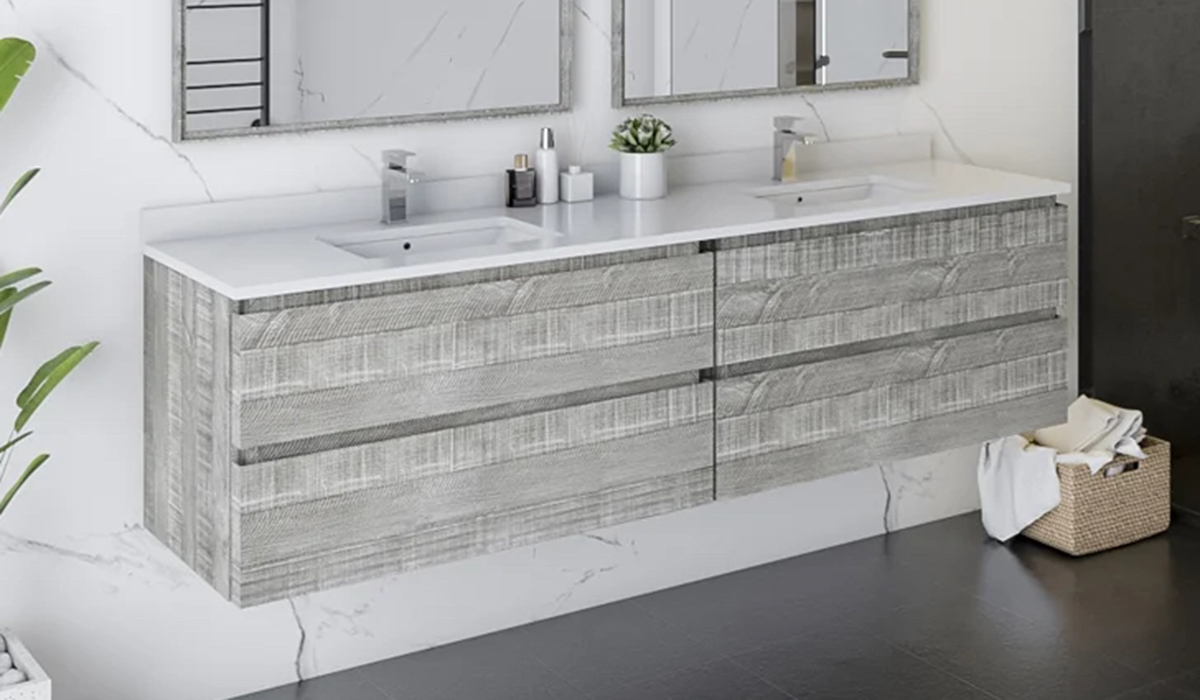
If you’re looking for cozy colors that evoke a beach or seaside setting, you really can’t go wrong with deep aqua and a sandy neutral. To add a bit of depth or interest to the space, integrating a gorgeous finish like polished nickel light fixtures can do the trick. 

This color combination of blue and silver might not seem like the coziest palette at first, but if you stick to a nautical theme in the furnishings and decor, you can create a space with a beach-house feel – and what’s more relaxing than imagining you’re at the beach!?

Mood board featuring aqua and nickel color palette.


Warm Yellow + Pearl White

A final example of cozy colors that can take any space from cold and uninviting to warm and welcoming is the combination of warm yellow and pearl white. Just like a soft daisy, yellow and white give off a friendly vibe, making it a great choice for a happy, cozy space. 

In recent years, warm yellow has been a popular choice for kitchens, as it is a bright and cheery color that inspires joy and comfort. Paired with white finishes (such as white cabinetry or a white-wood table and chairs), this color palette has a clean, springtime sentiment. Depending on the yellow tone you go with, this combination of colors can feel like the start of a brand new day with the sun softly shining!

Mood board featuring yellow and white color palette.


Lighting is also a huge factor in how cozy a space appears, so be sure to check out our list of top lighting products that can elevate any room in the house.

Explore Lighting

Thursday, September 22, 2022

What’s Out and What’s In: Interior Design Trends 2024


When it comes to home décor, some features never go out of style – like pops of plant life in the kitchen or a charming, built-in window seat in the bedroom. Other interior design trends, however, have a shorter shelf life and can dramatically date your home.

For instance, while shiplap walls had a bit of a renaissance in recent years thanks to the popularity of HGTV’s “Fixer Upper” and the modern farmhouse style, many home design experts now think the trend is tired and overdone. Just like shag carpeting in the 1970’s, many trends aren’t timeless, and you don’t want to spend time and money on décor that will make your home seem stuck in a time machine.

As we look ahead to 2024 (yes, it’s already that time!), here are several outgoing and incoming interior design trends that every stylish homeowner should know. 


Incoming 2024 Interior Design Trends


Gray and light wood bathroom with double vanity and fluted vessel sinks.

Fluting and Scallops

An unexpected detail, fluting adds texture and visual interest. It can go on the cabinets, walls, furniture, ceiling, or sink. In 2024, you'll see this dynamic featured in any room on any surface. It's an evolution of the curvy and organic lines that have been a top trend for the last several years.


Teardrop shaped chandelier with natural floral type design.


Outdoor-Inspired Interiors

As sustainable, green design continues to grow in popularity, designers are moving away from interiors that feel artificial. Instead, it’s becoming more popular to bring outdoor elements—like nature-inspired hues and materials—into interior spaces. 

Features like rustic bathroom vanities, jute rugs, rattan chairs, wicker baskets, earthy textures, or natural wood floors are all great choices that will make any space feel in harmony with the outdoors.


Singing the Blues

Thinking ahead to the colors that will be most on-trend in 2024, one really stand out. In a year defined by warm colors and beige neutrals, blue pops out as the unique choice of choice. More than one paint company chose a blue color as it's color of the year. Some to note: 

C2's "Thermal" is a light, airy blue that looks like a blue sky in the morning. Valspar's "Renew Blue" is a soft, yet vibrant blue that is relaxing and revitalizing at the same time. Minwax's "Bay Blue" is a turquois-y blue wood stain that lets wood grain shine through but adds undeniable color. 


Departing 2022 Interior Design Trends

Bright Colors

The last couple years have had lots of bright color. That's starting to be toned down in 2024. You'll see less red, pink, neons, and brights, and more beiges, sage, terracotta, etc. This turn doesn't mean no color, it just means more muted, warmed up colors. 

Edginess

Personalization in 2024 has shifted from edgy to personal. It's more about telling a story than it is creating a personality in your space. You'll see less geometrics, bold colors, blocking, etc., and more softened colors, vintage décor, and personal touches. 

Patterns

Patterns are never out of style. But some patterns ebb and flow with popularity. Florals will continue to be popular in 2024 but insects and butterflies are on their way out. Loud patterns like checks and geometrics will be softened.

Rustic

Vintage is still hot on 2024 but the more rustic side of vintage will fall by the wayside. Farmhouse, grannychic, and cottagecore will come out of the spotlight and mashups of historic and modern and blends of maximalism and hygge will come front and center.

As you think about refreshing your interiors with up-and-coming design trends for 2024, a good place to start is always in the bathroom! Why not revamp the space with one of these great ideas for a modern, updated walk-in shower.

Get Top Shower Ideas


Thursday, September 8, 2022

Tips for Mixing & Matching Metals in the Bathroom

Wall mounted bathroom vanity in gray with matte silver hardware.

Looking for a quick and easy bathroom upgrade that you can do in just one day? Instead of taking on a huge renovation project, start small with a simple task like changing up your bathroom’s cabinet knobs & handles. 

Though it may not be the first thing you notice about a bathroom, the hardware on your vanities, drawers, and cabinets can make the space feel outdated. Luckily, there’s a way to update cabinet knobs and handles that will infuse a modern, polished look to any bathroom—by mixing and matching metals.

Who said you have to stick to one metal when it comes to your bathroom’s finishes? It’s much trendier (and more fun!) to choose a few types of metals for your fixtures and hardware, so long as they complement each other and align with the rest of your home’s design.

To guide you in the process of mixing and matching metal hardware in your bathroom, here are our top tips for a seamless, well-balanced look.


Unique cabinet pull in brushed silver color.

Tip #1: Create Harmony, Not Competition

When choosing new cabinet knobs and handles, you’ll want to incorporate no more than three types of metals. After all, the goal of any interior design is to ensure all of the elements work together beautifully and form a balanced whole. 

This is why you should avoid choosing two metals from the same color family – like light copper and shiny brass. Oftentimes, metalware from the same color family will look similar but won’t quite match, making it seem like a mistake rather than an intentional choice. Instead, go for finishes that complement, rather than compete, with each other – like polished chrome and matte black.

Rubbed bronze cabinet pull.

Tip #2: Alternate the Handles on Doors and Drawers

A simple technique when mixing and matching metals is to choose one type of finish for the handles on your vanity’s doors and a different finish for the vanity’s drawers. For example, your vanity might have two doors and two drawers. You can select sleek, horizontal bar pulls for the drawers, while installing round knobs to the doors. 

It may be enough to mix up only the shapes of the cabinet handles and leave the finishes the same. The fun thing is that you have endless options when it comes to alternating the styles and finishes of the metalware in your bathroom, so you can make it as unique or as monochrome as you want.


Tip #3: Experiment with Different Textures

With so many interesting textures now available in cabinet knobs & handles, why not mix and match the actual feel of your new hardware? Beyond traditional finishes like matte or polished, modern metals can also be antiqued, brushed, burnished, hammered, hard-rubbed, or oiled to add dimension to your bathroom. 

Textured hardware is a fantastic way to add a distinct sensory experience to the hardware on your vanity or cabinetry that will not only feel good to touch, but will elevate the space from simple to sophisticated.

Unique cabinet pull with intricate details.

Tip #4: Make a Statement with an Accent Metal

Again, you want your hardware choices to create harmony in your bathroom, but there’s no reason why you can’t take this opportunity to make a bold statement! Once you’ve identified a classic base metal for a certain portion of your hardware, choose a more eccentric metal that can act as an accent for your favorite drawers. 

For example, nickel handles will brighten a traditional space, while matte black knobs will amplify the elegance of a modern bathroom. Or you can choose a single color and make a statement by combining a polished finish and matte finish, such as polished brass handles with brushed brass


Making upgrades like mixing and matching your hardware doesn’t have to break the bank. Here are several inexpensive ways to remodel your bathroom that will give it a high-end look: 


9 Bathroom Remodel Ideas


Thursday, September 1, 2022

Install a New Vanity in a Single Afternoon

Large double vanity with lots of storage with the doors open showing the plumbing.


A vanity is the central focus of the bathroom. A new vanity can be the breath of life your bathroom needs to feel and function completely differently. 

The best news? You can do it in an afternoon. Here’s how to install a bathroom vanity quickly and well. Ready? Set? Go!


Start with the Plumbing

Vanity projects can get messy quickly if you have to deal with water. Start by turning off water valves to the vanity sink, then turn faucets on to get rid of any remaining water. 

Next, remove the p-trap (that bend in the pipe at the bottom of the sink plumbing. You may want to have a bucket and towel on hand in case there is residual water in the pipe. 

Disconnect water lines from the sink using an adjustable wrench. These steps are pretty simple and very DIY-able but if you feel uncomfortable about it, get help from a plumber.


Blue single vanity installed in a white bathroom.

Disconnect the Vanity from the Wall

Your vanity is connected to the wall with screws inside the vanity and some caulk on the outside of the vanity. Cut the caulk that seals the top rim of the vanity or backsplash to the wall using a utility knife. Be careful not to damage the wall itself.

Next, unscrew the unit from walls/studs. Then simply pull the vanity away from the wall. It may be easier to remove the top of the vanity before pulling the cabinet away from the wall. If you plan to reuse the vanity top, this is a must. 

Removing an old vanity may result in a few dings. If there has been any damage to the wall, make any repairs needed before moving on. 


Wood grain single wall mounted vanity in a small bathroom with a patterned tile floor.


Choosing a New Vanity & Faucet

If you haven’t picked your new vanity yet, you’re in for a treat. DecorPlanet is the home of a wide selection of beautiful vanities from classic styling to clean-lined modern, pedestal to double vanity. You’ll find what you’re looking for here. 

Shop Vanities 


While you’re at it, think about selecting a new faucet too. Gold and Champagne colors are popular right now, but we’ve always got classics like polished chrome or brushed nickel in a variety of styles. 

Shop Faucets


Large wood double vanity with all the drawers open.


Prep for the New Vanity

With the old vanity removed, it’s time to get ready to put in the new one. Measure the vanity height and width then mark that height and width on the wall. Use a stud finder to locate where the wall studs are and mark them. Removing the doors on your new vanity will make things a bit easier, but it’s not necessary to get the job done. 

If your vanity has a solid back, measure where the pipes and water lines are on the wall then mark those same measurements on the back of the vanity. Drill a pilot hole in the center of where you need to make an opening then use a hole saw to cut out the right size circle to accommodate the pipe or water line.


Rerouting Plumbing

If you need to reroute any plumbing, such as if you’re moving the sink or going from a single to a double vanity, you’ll likely need a plumber. It may seem straightforward but any plumbing problems can quickly cause irreversible water damage.

Once you have the vanity removed from the wall and when you’re ready to install the new vanity, that’s the perfect time to get all your plumbing squared away. Call your plumber in advance to get on the schedule and keep your project moving.


Install the Vanity

With the proper holes cut in the back of the vanity, you’re ready to install. Line up pipes with the holes in the back of the vanity and gently slide it up against the wall. Check to see that it’s level across the width of the unit and the length of the unit. If it’s not level, use shims to adjust it. You can use a quarter round molding to finish off edges at the floor, especially if there are gaps from shims.

Using your stud marks, drill in pilot holes through the vanity and into the stud then screw it to the wall with 3-inch screws. If you don't have a stud, use a wall anchor with your screw. If you are screwing into alternative surfaces like tile or plaster, use the drill bits and wall anchors suitable for that type of surface.


A large wood double vanity with integrated sinks fully installed.


Top it Off

If your vanity doesn't come with a top, install it next by adding a bead of adhesive to the top edge of the vanity all the way around then place the top. You may want to ask for a little help placing a heavy vanity top to ensure you get it straight.

Caulk anywhere the vanity touches a wall to seal it up and stop water from leaking behind the vanity. Install the faucet using manufacturer instructions.


Finish with Plumbing

You’ll end where you began, with the plumbing. Reinstall the p-trap, reattach water lines (be sure to use teflon tape to decrease leaks), tighten down everything then turn the water back on. Test for leaks at every connection by turning the faucet on and letting the water run for a few minutes. 


Changing up the entire feel of the bathroom design can be as easy as installing a new vanity. It’s a simple project you can do in an afternoon but has a huge impact. If you ever need assistance, get in contact with your local plumber or talk with our customer service team.

Need a little bathroom design advice? Check out the latest trends. 


Get the Latest Bathroom Trends