Thursday, October 20, 2022

Foolproof Wall-Mounted Vanity Replacement Guide

White bathroom with blue double vanity.


When it comes to bathroom renovations, you may be surprised to learn that many agree the number one must-have item is a new vanity. As one of the main features of any bathroom space, vanities do so much more than house your sink. They provide storage, offer a countertop for decor or hygiene products, and they also hide unsightly plumbing. Replacing your bathroom vanity with a newer model is a great way to instantly transform the space, and there are plenty of affordable, high-quality vanities available to choose from that will work well with any design trend. Ranging from antiquated or vintage to sleek and modern, vanities set the tone for the rest of the furnishings and color palette in your bathroom, so it’s key to choose one that’s stylish as well as functional. But what about wall-mounted vanities? Are they just as easy to install as vanities that rest on the floor? Though wall-hung vanities may seem like more of a challenge, adding this type of modern feature doesn’t have to be stressful. By following this foolproof wall-mounted vanity installation guide, you can easily and expertly install a new vanity for a seamless bathroom upgrade.

Gray bathroom with single vanity in wood cabinet and white integrated sink and countertop.

First: Weigh Your Options

The amount of wall-hung vanity types and styles available may overwhelm you at first, which is why it’s wise to focus on the individual elements as you weigh your options. Are you replacing a vanity in your master bathroom? If so (and if you have the room for it), it’s probably best to choose a double vanity with space for dual sinks. In a half-bathroom, it makes more sense to choose one that is proportional to the space, like this wall hung modern bathroom vanity. This is also the stage where you’ll want to consider things like color, hardware, and function. Do you need your vanity to come with plenty of storage? Will your new vanity complement the flooring and fixtures? Keep in mind that vanities often act as the unifying design piece for the entire bathroom, so make sure your final choice is on-trend and matches your set color palette.
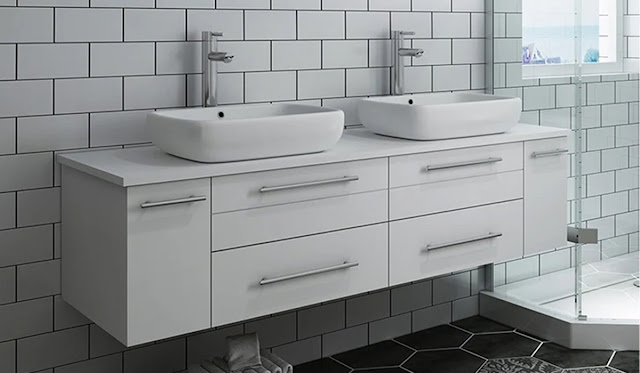
White double vanity in a white bathroom with subway tile.

Second: Remove the Existing Vanity

The next step is to make space for your new vanity by removing the old one. Begin by locating where the water valves are, which are typically beneath the sink, and turn off the water supply. It’s critical to turn on the existing faucet after doing so, as any built-up water pressure in the pipes will be released. Next, disconnect the water lines from the valves with an adjustable wrench. You’ll likely need to cut the caulk or sealant that connects the sink’s backsplash to the wall, which will allow you to lift and remove the existing sink or vanity top. Finally, you can remove the screws that are holding the vanity to the wall and pull the vanity out.

Dark wood single vanity in a white bathroom.

Third: Repair and Repaint the Wall

It’s usually inevitable that you’ll damage a wall during the process of removing the old vanity. If this happens, don’t panic! You can quickly repair surface defects with a putty knife. After repairing any holes or knicks in the drywall, you can then use a paint brush to touch up the wall. Once the wall looks good as new, you will be perfectly set up to install the replacement vanity.
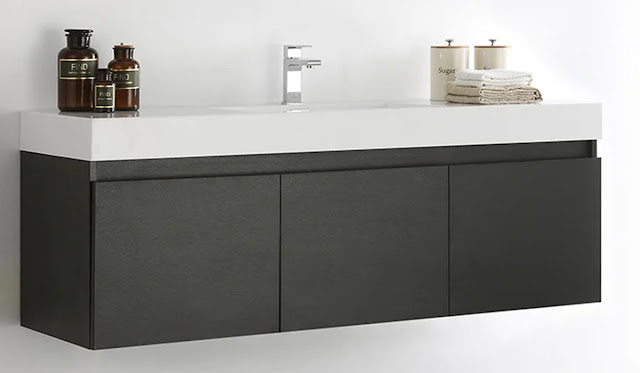
Dark modern vanity in a white bathroom.

Fourth: Install Your New Vanity

The final step in our vanity installation guide is to – you guessed it! – mount your new vanity on the wall. After measuring and marking where the studs are on the wall, you’ll want to make sure you have an extra pair of hands to help you mount the floating vanity. You can use buckets or wooden slats to raise the vanity to the right spot. Once the vanity is lined up properly, you can drill screws into the wall’s studs. Following this, it’s time to secure the vanity top, drawers, sink faucet, and reconnect the water supply. With everything in place, you can finish off the look of your new wall-hung vanity with decorative elements like houseplants, candles, or sculptures – or add practical items like a toothbrush holder, soap dish, or tissue box.

Looking for other additional ways to upgrade your bathroom? Here are some of our favorite indulgent ensuite bathroom ideas that will take any space to the next level.

Upgrade Your Bathroom

Thursday, October 13, 2022

10-Point Bathroom Remodel Checklist for Stress-Free Success

Neutral bathroom with double vanity after a bathroom remodel.

Does your bathroom have a serene and spa-like feel, or is it the one room in your house that’s desperately in need of an update? As one of the most used and shared spaces, the design of your bathroom is highly important not only so the space promotes relaxation, but so it adds to the overall value of your home.

When starting any home remodeling project, you’ll want to begin by creating a bathroom renovation checklist. What are the things you want to improve that are already in your bathroom? What are the brand new elements that you will be adding from scratch? 

Thinking about your goals – including what you want to remove, add, or improve – will help your project scope become more tangible. From there, you can set a budget and make sure the renovation gets underway with as few surprises as possible.

Since renovating a bathroom can be time-consuming, costly, and complicated, we prepared a helpful 10-point checklist to ensure your project stays on track from day one.


Person hanging tile in a bathroom shower remodel.


1. Visualize the concept

Months before any real demolition begins, you’ll want to conceptualize what you want the final product to look like. This can be done by finding inspiration online or on social media, or by hiring an interior designer who can draw up a visual blueprint. There are also apps that allow you to imagine your space in new ways. 

During this stage, you’ll want to collect measurements and choose which colors, materials, and finishes you’ll use.

2. Take measurements

Take accurate measurements of your current bathroom space. This will be necessary for any design work and planning. If you're changing up the layout, take note of where each electrical outlet, fixture, and all the plumbing is located so you'll know if you can work with what you have or if you'll need to move things.


Blueprint with tile samples surrounding it.


3. Set a working budget 

When we say “working” budget, it’s important to leave a little wiggle room in the financing of your project since things will inevitably cost more than you expect. On average, a bathroom remodel in the U.S. costs between $9,600 and $11,000, but they can be up to $50,000 for a truly lavish design. 

You’ll want to factor in costs such as materials, appliances, fixtures, flooring, labor, and inspection fees, among others.

4. Obtain permits

Check with your local authorities to see if you need any permits for the remodel. You may also need inspections during each phase of the remodel. Planning these in advance is key to staying on schedule as you will probably have to wait for inspector availability.


Person hanging tile in a shower remodel with plumbing and electrical unfinished on the wall.


5. Go behind the walls

Install or update plumbing and electrical systems as needed. This is usually only a necessity if you are changing the layout of your bathroom or if components are in need of repair or replacement, such as if your home is older. 

6. Factor in lighting and electrical considerations

Though light fixtures won’t be installed until the very end, your electrician will need to know how many junction boxes to install, as well as how many switches or dimmers you’re expecting to have. 

Think outside the box with your vanity lighting; rather than a set track of lights above the mirror, it is becoming popular to see modern sconces on either side that are at eye-level. Also, electrical features like heated towel racks or even heated flooring add great resale value to homes, but again, these updates are something your electrician will need to be aware of early on.

7. Start with the basics

Before you start bringing in things like a new toilet or lighting fixtures, focus on the walls and floors of the new bathroom first. Perhaps you want your walls to be completely covered in beautiful tiles, or you want to revamp the baseboard heater covers to match the ones in your bedroom. 

Completing foundational elements first will make the rest of the additions go much more smoothly, as you won’t be working in reverse order.


Person installing shower fixture in a tiled shower.


8. Put down plastic sheeting 

Once the floor and walls are refreshed, you should cover the flooring and any other exposed furnishings that you’re keeping (like a bathtub or vanity) with plastic sheeting to protect them from being damaged. 

Plastic sheeting can be purchased online or at any home improvement store. Especially if you’re planning to knock out drywall or tile, plastic sheeting is an absolute necessity to ensure things like flooring, baseboards, and cabinetry aren’t damaged.

9. Install finishes

As you approach the end of your remodel, you'll be surprised by how many finishing touches there are. Apply final coats of paint, install cabinet handles, towel bars, toilet paper holders. Hang mirrors, check that all plumbing and electrical elements work as expected. And finally, clean up. 


Close up of double vanity with modern silver faucets.


10. Tie it all together with décor

After all major foundational updates have been completed, you’ll be free to focus on tying the new space together with classy décor and finer details. If you’re shopping online, it’s wise to purchase these types of items early on, as they might take several weeks to ship. 

Some ideas you can incorporate include updated cabinetry pulls in a cool chrome finish, handy pull-out drawers beneath your vanities for storage efficiency, new bath mats or hand towels, over-the-toilet shelving for extra organization, and new artwork or sculptures.


As your bathroom renovation gets underway, be sure to know the projects and trends that give you the best return on your investment, and those that you should avoid. 

See Trends to Avoid